Finalize Cloned Disk
After I have cloned a disk from the sample disk. Next, I’m going to reboot the cloned disk on another PC. Then, Sysprep will regenerate the computer’s security ID (SIDs) and initialize Mini-setup to prepare the Operating System which is the topic I’ll cover in this post.Note: Some steps in this post may not be the same with yours. It depends on the Answer file. If you have configure it in the Answer file, it won’t ask again at here. But if the configuration in the Answer file is error, it’ll ask you again. For instance, if you type wrong product key, it will show the error and let you enter again at this step.
Step-by-step
- When you boot the cloned disk first time, you’ll see the screen like the figure below.

- On Windows XP Professional Setup, click Next.

- On License Agreement, select “I acccept this agreement”. Click Next.

- On Regional and Language Options, configure keyboard language and standards language. Click Next.

- On Product Key, enter the an unique product key of Microsoft Windows XP. If you have single product key which can be used in many computers, you can configure the product key in the answer file and you don’t have to enter on each computer anymore. Click Next.

- On Computer Name and Administrator Password, enter the Computer Name and specify the administrator’s password. Click Next.

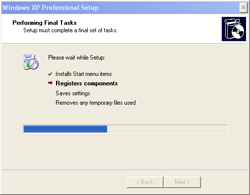
- On Performing Final Tasks, waiting Sysprep to process.

- That’s it. The computer is finished cloning and ready to use in production.

0 comments
Post a Comment